 [1]
[1]
What’s inside? Worms!
If you have a garden you probably already know that earthworms are good for your garden. You may be aware that one of the best fertilizers is worm castings. If you already compost and do your best to amend your soil with organic matter, you are already going a long way toward attracting these garden helpers.
Although the earthworms currently living in your garden or yard will be attracted to any compost pile, why not take your relationship with worms up a notch with vermicomposting?
Vermicomposting is the intentional use of confined earthworms to break down organic matter and yield fertilizer. Worms bins are what the earthworms are kept in, where they are fed, and the things from which you collect the valuable worm castings (hereinafter: worm poop).
Parts and Construction of the Two-tier Worm Bin
 [2]
[2]
Let me introduce you to my system and to my happy worms, so you can see how uncomplicated it is to create and manage a simply-constructed and easy-to-use worm bin that will yield many gallons of valuable worm poop each year. (A materials list and step-by-step assembly instructions are here in Word [3] or as pdf [4].)
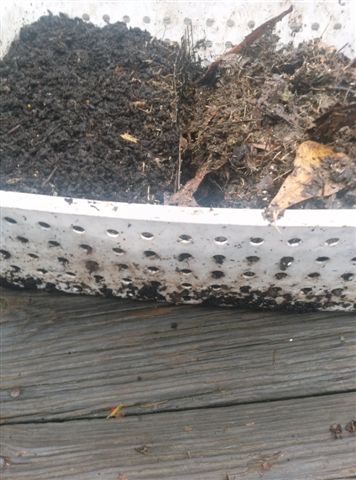
My worm bin is a two-tier system housed in an ordinary 50 quart plastic storage container. (A single-level system could be constructed using a shallower container.) I drilled holes in the side of the container for ventilation. Containers used for worm bins should be opaque because worms like it dark.
Inside of the large storage container are two plastic tubs. One of the tubs is a plastic dish pan, with holes drilled all around it.
 [5]The other is a plastic storage tub that already came with holes.
The only reason I drilled my own holes in the first one is because that is the first tub I found that would fit inside of my outer container. At first I was only going to have one level, but when I saw the storage container with the predrilled holes, I realized it would be easy to have two levels within the outside container, and so that is what I did.
It would be easy for you to find two of the storage containers with holes already around them so you don’t have to do so much drilling, which was the most tedious part of the entire construction process.
 [6]You mght wonder why I did not just put the worms directly into the outside bin. That might work if the bin were shallower — say half as tall as it is. But if you started trying to do the vermicomposting in a bin this size by putting compost in up to the full depth of the container, it would be very difficult to manage. For one thing the worms’ instinct is to go down. They would collect at the bottom of the container and it would be difficult to stir them all up frequently enough for them to work their way through all of the compost. They would also tend to come out of the holes on the side. With the ventilated tubs inside the larger bin, any worms that come out are found on the insides or floor of the outside container. So even if I were creating a worm bin from a shallower storage container, I would want to have a separate inside tub.
 [7]It is important that the two containers are able to fit inside of the larger container with its lid on and you have to be able to stack one on top of the other without the top one shifting and falling into the bottom one and compressing the contents.
I use a leftover piece from a metal shelving system to support my top tub on my bottom tub.
But there are a lot of ways to do it: the right size dowels laid across the top of the bottom tub would be another option, as would four cans stuck into each corner as supports.
 [8]Both of the tubs are set up in the same manner and are managed in the same manner.
They are divided across the middle with a piece of metal mesh or screen. This is just ordinary hardware cloth that can be found in any hardware store. It is simply cut to match the height and width of each tub and it is placed inside, not fixed or attached in any way — not necessary because the contents of the tub keep it in place.
Again, there are a lot of options with this part. Instead of the wire mesh, anything that can be used to segregate the two sides of tub while allowng the worms to migrate through would work as well.
Bedding and Feeding the Worms
The bedding I currently use for my worms is compost from the compost bins in my garden. I usually have three compost bins going in various stages of decomposition. My compost bins contain garden waste, raked leaves, grass clippings, and all compostable kitchen waste.
 [9]When I first started the worm bin, I followed the recommendation of some online who use a combination of shredded newspaper, with peat moss, a bit of dirt, and leaf litter.
I have found that using the compost works better for me, plus it means I do not have to shred newspaper or purchase the peat moss. Also the shredded newspaper would tend to collect into indigestible clumps.
The worm bin would probably work fine with the compost alone since it is all organic matter that worms would naturally break down and also contains some dirt which they need for their digestion. But in order to make it possible for the worm bin to support a denser population, I also feed the worms directly. A dense population is desirable because it increases the speed at which the contents are turned over and increases the production of worm poop.
 [10]I do this by taking my kitchen scraps about once a week and putting them into the blender with some rainwater. I run the blender until the kitchen scraps turn a soupy consistency — like making a smoothie for the worms.
Whenever I put new bedding in one half of the tub, I pull back part of the bedding, pour in a good bunch of this smoothie, then cover it over with the bedding again. The compost should become wet, but not too drippy. (Excess water collects over time in the bottom of the bin. This is called worm tea and is itself great fertilizer.)
The three pictures in this section show how the bedding looks as they gradually work through it. It breaks down and becomes finer and finer and more homogenous.
 [11]By the way, you will not see the worms on top of the bedding like this. They like to hide underneath, but if you turn it up, you’ll see scores of them. As soon as I snapped their picture they slithered back down. Some people lay cardboard on the surface of the bedding so the worms will come up to the top, but since I put on my gardening gloves and stir the bedding up a couple of times a week to aerate it, I dispensed with the cardboard.
It is important to aerate the bedding like that, and to have good ventilation (holes) in the system, because the worms need air and it prevents anaerobic bacteria from building up and making it stink. Worm bins are not stinky, although if I have made a smoothie with bananas in it, mine will have a bit of a banana smell for a day.
How the Worms Switch Sides
 [12]
[12]
Lots of worms where the food is
When I see that the worms have just about finished with the compost on one side, I put in new bedding and food on the other side.
The worms then migrate through the mesh over to the new bedding.
 [13]
[13]
Only a few worms left in this side
You will see the population of the worms on the finished side dramatically decrease as they congregate to the fresh munchies on the other side.
After a few days to a week or so, all of the worms (except for a few stragglers) will have migrated away from the finished compost , which by now is nearly all worm poop, and into the new bedding, where they happily continue the process.
Harvesting Worm Poop from Happy Worms
 [14]
[14]
Keeping the lid on the bin keeps flies from getting to it. I have only once had larva of some kind (not maggots, much larger) appear in my worm bin. They did not seem to bother the worms and I just gradually hand-sifted the larva out and fed them to my chickens in the course of aerating the bin and harvesting the worm poop.Ants are soemtimes attracted to worm bins, but the couple of times that happened, I sprayed some Raid on the deck under the bin and kept going with no problem. Organic repellent put around or under ant bins would also work.
Most of the time I’m able to keep the entire setup on my deck. I pull it inside when we have freezing weather or if we have a prolonged period of temps near 100°F. If you have a long cold season where you live, this system can be set up in a garage, basement, or even a corner of a kitchen. The worms are active between 40° and 80°F, with their activity increasing as it is warmer. I can tell if the worms like the condition in the tubs; if they like the conditions they will stay in the tubs. If it gets too wet or too dry, they start trying to get out and then I find them on the inside wall, or at the bottom of the outside bin. It has never been hard to tweak the conditions slightly to make them contented.
 [15]After the initial set up, every time I put in new bedding for the worms, I am harvesting the finished product, the worm poop fertilizer.
As I harvest the worm poop, I toss any remaining worm eggs and worm stragglers over into the compost side. This is not necessary; I could simply shovel the worm castings out without concerning myself about the few worms or eggs on that side, but I just have a soft spot for the worms. If I felt very pressed for time, I would ignore them, though, and you can too.
When there is too much of a worm population explosion, I feed them by the handfuls to my chickens — I have an even softer spot for my 5 laying hens! The limiting factor for me is how much — or how little, rather — time I want to spend on the feeding/harvesting. Obviously the system is scalable upwards indefinitely.
How to Get Your Worm Bin Started
To get started, you need worms — the kind you want is Red Wigglers. You can get worms from a friend who already has a worm bin, buy them from a local store (I bought my initial bunch from Petsmart), or order them online [16].
When you first set up a worm bin like this, you would only put bedding on one side of each tub and feed the worms a kitchen compost smoothie. Do not include meat, dairy products or raw egg shells — cooked shells are are okay but should be crushed. Citrus should be only a small fraction of the total to avoid making the bin too acidic. (If you don’t have a blender, just chop, mash or grind up your kitchen compostables as well as you can and moisten with rain water.) The worms will immediately begin to work the compost or bedding with the food in it. They begin to eat and digest all of the rotting organic matter.
 Every 2 or 3 days, remove the tubs from the bin and stir the bedding up in both tubs to aerate the contents — this only takes a couple of minutes. This gives you a chance to inspect the progress of the composting and be alert to any problems. When the compost begins to look well-worked — mostly black and crumbly — then put fresh compost on the other side of the tub and wait for the worms to migrate over. Aerate both sides now to keep conditions healthy. The worms will continue working the first side for a few days, or even a week or more, but as that side becomes all poop, they will move to the other side for food. Then it will be time to havest the worm poop fertilizer and refill the now empty side with new compost or bedding and start the process over.
You can see the dramatic difference between the original compost bedding and the finished product in the above picture.
Got Worm Poop — Now What?
So once you get yourself a bucket of worm poop, what do you do with it?
Worm poop is a gentle fertilizer; unlike cow and chicken manure, it can be used immediately on your plants in varous ways.
> You can create a seed starting mix using equal parts worm poop and sand.
> You can use worm poop as an ingredient in your own potting soil mix or add it to purchased potting soil.
> When setting bedding plants into the garden, add a fistful of worm poop to the hole.
> For established plants, the worm poop can be used to topdress their soil.
> Let a cup of worm poop steep in a gallon of water for a week to create worm tea for liquid fertilizer.
I hope you found these instructions as easy as I think they are. Hover on any picture for a description or click to see a larger version of it. Download a materials list and step-by-step assembly instructions here in Word [3] or as pdf [4]. Enjoy your worms!
(© 2013 Mary Kochan)